Sonntag, 9. Februar 2014

Brush Cleanser Comparison


Hey guys,

So are you still looking for a good brush cleanser? I tried the MAC brush cleanser and the KIKO brush cleanser and today I want to tell you which I like better and why and what they have in common and where they are different. Let's get started ;)


https://blogger.googleusercontent.com/img/b/R29vZ2xl/AVvXsEi4NCdB06_Wu6flkGWaaqrt_jyHgNmkjI1Er9Ckne12GQTsZQ09wVfbwfsdCu2sgattzmLa8IbCOZOCvoCg-3dcRtMfca_4AFtfiAv0KyUI05adN9cCwKSnbr0jjQ4PcxnsAy2073_Zr0Ie/s400/N_1_P_KM0050201000000-_Brush-Cleanser.jpg
 
http://media.douglas.de/059671/300_0/MAC-Make_up_Werkzeuge-Brush_Cleanser.jpg
 
So first I tell you about the cleanser from KIKO. The products come in small pump spray bottles which hold 50ml or 1.68FL.OZ. The bottle costs 5,90€. You use it by spraying the product on the bristles and wiping them on a cloth afterward. According to the company the result should be: a perfect clean and soft brush, usable right away. Cleaning brushes this way is only spot cleaning and not deep cleaning but if you use your make up regularly you spot clean your brushes rather often.

Okay that much to the general information, now to my experience. I used it according to the instructions, but I had a problem right away, I had a lot of product left in my brush after the first cleaning, so I repeated the procedure several times but I still had way to much product left in my brush. I went through the 50ml very quick. I actually made it to “clean” all my brushes only once and the bottle was empty. Another problem I had was that the brushes where not ready to be used right away, not even the next, because they were super sticky! The bristles where oily and were sticking together. I tried to wash them out with water later but that didn’t work. To be able to use them again I had to deep clean them with baby shampoo. 

The MAC brush cleanser contains 233ml for 16€, which means 50ml cost 3,50€. The bottle has a small opening so you can easily dose the amount of the cleanser. The product  is supposed to extend the life of high quality brushes. Brush Cleanser leaves your brushes smelling fresh and clean, and helps shorten their drying time. You can use the cleanser to spot clean or to deep clean. I usually use it to spot clean my brushes, for deep cleaning I use baby shampoo because that’s even cheaper and works very well. But I spot clean mine regularly so I love the MAC brush cleanser.

I have to say I don’t have any problems with this cleanser. You only need a small amount of it to clean a lot of brushes. You just put a bit on a piece of cloth and then you swirl your brush on the cloth and your brushes get cleaned ;) The brushes dry very quickly and you can use them pretty much right away. The bristles feel soft and clean and are like new again :)

A last point why I prefer the Mac cleanser is that it is a lot cheaper it’s nearly half the price of KIKO.
I hope you found this helpful and that you all had a great weekend.

Have a good start into the new week!!

Your Dahlia

Sonntag, 26. Januar 2014

Samstag, 25. Januar 2014

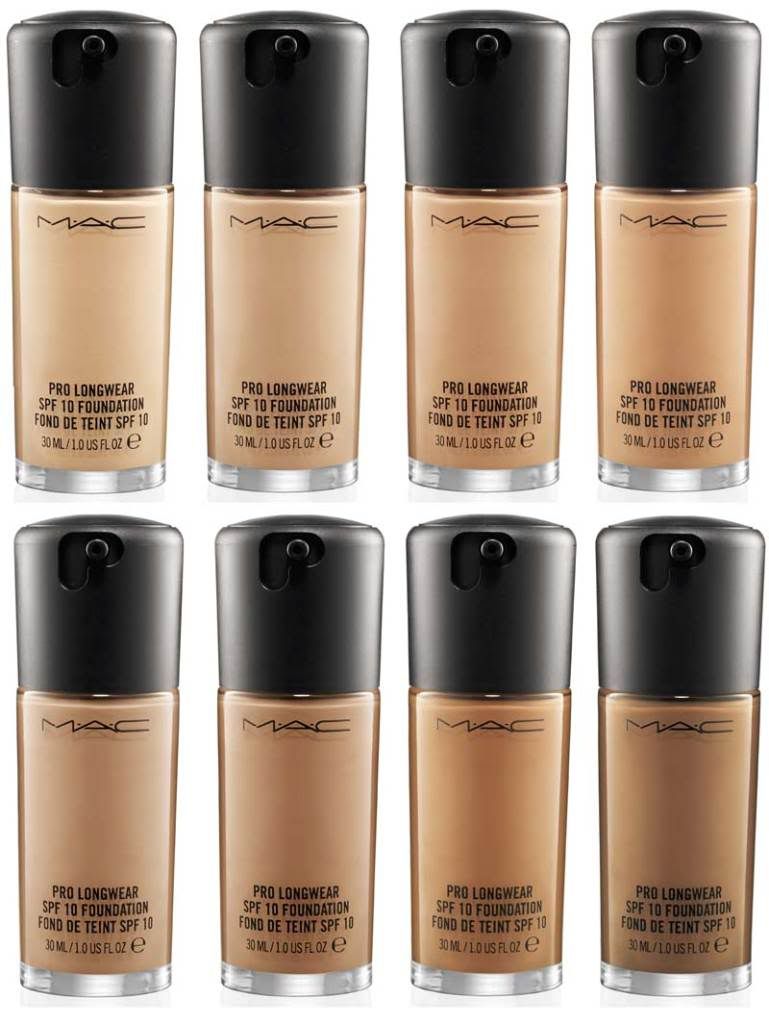
Review on Pro Longwear Foundation by MAC


Hey everyone,

I bought this foundation by MAC several weeks ago, because the once I had were too dark or vanished rather quickly and when you have a long day you don’t want to touch up all the time ;) 


The foundations by MAC have a wide range of colours, which I think is great. I have the Pro Longwear in NC15 which I think is the lightest colour. The foundation comes in a glass bottle with a pump, which makes it easy to dose for me.

NC15

It has a good coverage, about medium to high coverage on my skin (mine is oily in my T-Zone) and it stays on for a long time, usually over 6 or 8 hours, and moves minimally on your skin over the day. The foundation has a nice consistency, firm but it can still spread a little on its own when you put a little on the back of your hand. The foundation dries really quick on your skin, when you apply it, so you shouldn’t take too much time when you put it on, like I did. When I applied it the first time I took most of it off again because I have been too slow ;) The foundation gives a velvety kind of finish, which I think is great for the colder times of the year.

The foundation works well with powder products, like bronzer, blush and contouring because you can blend them in really but when you are done they stay put.

The price is okay with 32,50€ and 31$, since it’s MAC makeup and when you consider buying it you have to be aware that MAC products have their price.

A negative aspect from my point of view is that if you have dry spots on your skin that the foundation makes them pretty obvious and even pronounces them, so you should have a good primer. You also should clean your face really well in the evening before going to bed because it stays on so well.

I can really recommend this foundation, especially if you have problems finding a foundation that stays on your skin without moving. Do you have a foundation you can recommend or you would like me to try and give you a review about? Just let me know and I will try to get it and test it;)

I hope this review will help you :)

Have a great Sunday

Your Dahlia

Mittwoch, 15. Januar 2014

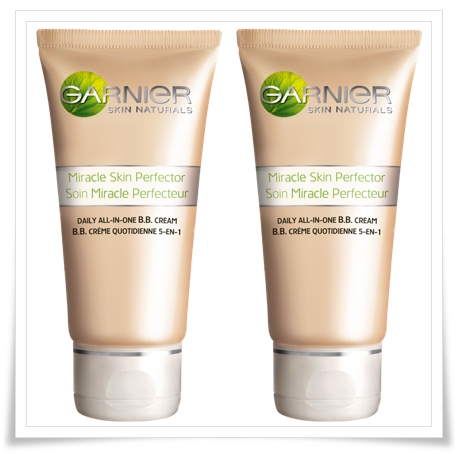
First impression on BB Cream – Miracle Skin Perfector by Garnier


Hey Guys,

Today I have a first impression for you on the BB Cream Miracle Skin Perfector by Garnier. I got the cream because I had a coupon for it and thought I give it a try after I heard so many good things about BB Creams especially by Garnier and my skin is quiet good at the moment.

Garnier BB Cream Miracle Skin Perfector

Till today I only wore it twice once I applied it with my fingers and the other time with a brush.
 You can buy the cream in a dark and a light shade, I have the light one. The cream has a quite thick consistency and has the typical cream smell to it. It is really smooth and easy to distribute over your skin.

The cream has a really light coverage as it is typical for BB Creams so it doesn’t cover any blemishes you might have. But the funny thing is the light version is still too dark for me and for other pale people as well. On my face it looks alright but it creates a rim and even if I take it down my neck, which looks really weird. Also it seems that it pronounces my pores rather than making them smaller or vanish. Also I don’t like the finish, it doesn’t feel light and as if you don’t wear anything on your face but rather like you have a thin film of cream or wax on your face. Over a longer period of time I didn’t notice it anymore but my skin felt rather oily, especially around my T-Zone. I had to powder my face several times a day which I don’t like. I rather but my makeup on in the morning and maybe touch up my lipstick but no more.

I will keep testing it over the next few weeks and give you then a final review. But after the first impressions I would say I wouldn’t buy it again. Maybe in summer its better because I might tan then a little and the colour will fit me more. So I will try it again then as well.

I hope you found this first impression helpful! ;)

Have a great day everyone

Your Dahlia

Sonntag, 12. Januar 2014

Realtechniques review


Hey guys,

Today I have a review about my Realtechniques brushes which I bought in September 2013 at Boots in London during a longer weekend holiday. I have the following brushes :

-            - Blush brush
-          -Buffing brush
-          -Expert face brush
-          -Contour brush
-          -Pointed foundation brush
-          -Detailer brush
-          -Deluxe crease brush
-          -Base shadow brush
-          -Brow brush
-          -Accent brush
-          -Pixel-point eyeliner brush


I really like to use the Realtechniques, because they are easy to use, soft to touch, easy and effortless to clean and the bristles are synthetic, which makes them  vegan and cruelty free.
The first is the blush brush.I really just use it for blush which it is great for but I think it would also work great for applying powder to set your makeup.

For setting my makeup I usually use the buffing brush. Which I think it is great for because the bristles have different length. The white ones are a little longer, and I think because of that you don’t need as much powder. It’s the same with foundation, it leaves an airbrushed finish.

I use the Expert face brush to apply my foundation, which is at the moment the Pro Longwear Foundation. It applies my foundation evenly and easy and your done in no time ;)

Next the Contour brush is easy to use but can pick up the product really well, so you have to pay attention, that you don’t get a brown streak across your cheek. To avoid that you just have to circulate the brush a little and it will blend the product in really well.

The Pointed foundation brush I usually use for concealer, because it’s not so big and fits well underneath the eye. It’s also great to cover bigger or smaller spots you might want to hide.

The Detailer brush I love to use form my lips, usually for bold red lips, like ruby woo, because with it you can be really accurate, which I think is really important for red lip!

The Deluxe crease brush I use for concealer as well because it’s easy to use, similar to the Pointed foundation brush.

Next the Base shadow brush is great because you can apply eye shadow all over your eyelid, you can use it as a blending brush or to apply cream shadows or paint pots. You can use it so many ways and in every way it works perfect.

The Brow brush I usually use to put a little eye shadow on the outer corners of my eye or just beneath my lower eyelashes or to deepen the colour in my crease.

The Accent brush I use to smudge kohl or eye shadow close around the eye. Or use concealer on the outer lines of my lips to sharpen the lines.

And at last Pixel-point eyeliner brush. I have to say I don’t really use it because for using it for eyeliner it’s too big at least for me. It’s not accurate enough. I’ve tried to use it for smudging for which it’s really nice. But the pixel-point eyeliner brush has been replaced by the Fine liner brush, which is supposed to be more precise.

After telling you about every brush individually I have to say they are perfect for beginners or people who are advanced or maybe even professionals. They are easy to use, if you are a beginner with makeup you can find videos on YouTube by Sam and Nic Chapman, who are also the designers of the brushes; under the name pixiwoo or on the YouTube channel of realtechniques where the two sisters show you how to use the brushes and makeup. Also the easy cleaning is a big bonus too! ;)

If you are not from the UK like me and there is no store in your country that sells the brushes you can easily buy them over the internet, for example via Amazon or www.realtechniques.com but realtechniques ships currently only in the US.

Also positive is that the brushes are really affordable and you can get whole kits/sets which make them a little cheaper with a nice case which can stand on its own. 
At the last I’m just going to tell you my favorite and the worst brush. The favorite is the Base shadow brush because it’s so versatile and I use it the most. My least favorite is the pixel-point eyeliner brush because I don’t really have a use for it.

Do you have brushes from Realtechniques? Which one and what is your favorite and why?
I hope you found my review helpful
Have a great day everyone!!

Your Dahlia

Montag, 18. November 2013

A little DIY - Brush Guard


Hey everyone,

Today I have a little DIY for you. It’s about how to make your own brush guard.
Okay so I use a brush guard after cleaning my brushes, so the bristles get in form and the brushes last longer. And this is how you can make the brush guard.


 Okay first you need a piece of cloth, I think the best is when it’s cloth with stretch/ elastic. You can use an old jeans or other old clothes.

You cut out a piece that is a bit wider than your brush, about half a centimeter to a centimeter. Lengthwise the cloth should be about 0,5-1 cm over the bristles and also on the handle.


After that you put your brush in the middle of the cloth and fold it over. Then you mark the point on the cloth that is the closest to the brush. 


Then you take a stapler and use it on the point you marked before. After that you test if it’s too tight or too wide. If it’ too wide put in another staple, but really close to the first. If it’s too tight you can just remove it. If you don't have a stapler or don't want to use is you can also use needle and thread, which will take a little longer, but will work just as well ;)


This is a quick and easy way to make a brush guard if the bristles of your brush are bent.

I hope it will help you

Have a great day everyone!!


Your Dahlia